うちのゼミの活動を通してわかったことをまとめてマニュアルにしています.
まだ世間では Java は SE 7 が標準なのでしょうか.
Java SE 8 / Java FX 8 に関する情報がまだ世間に少なすぎて,仕方がないので本家ORACLEのサイトを見ながら,サンプルプログラム作って実験しながら自力で使い方を発掘しています.
まだまだ発展途上で,やり残し満載のマニュアルですが,どんどん加筆してゆきます.
PDFで約2.7MBです→javafx_main.pdf
まだクレームをいただけるような状態でもないですが,ご意見いただけたらありがたいです.
→ katsu_wm%mukogawa-u.ac.jp (%を@に変えてください)
【マニュアル中のサンプルプログラム】
● FXsample01.java
● FXsample02.java
● FX3Dsample01.java
● FX3Dsample03.java
貼り付ける画像:texture.gif
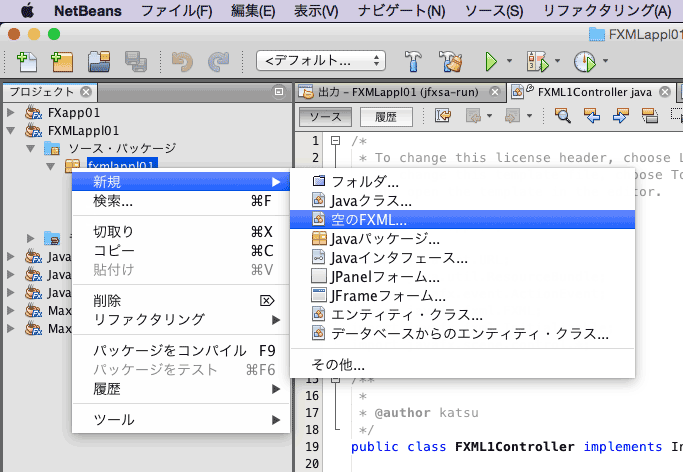
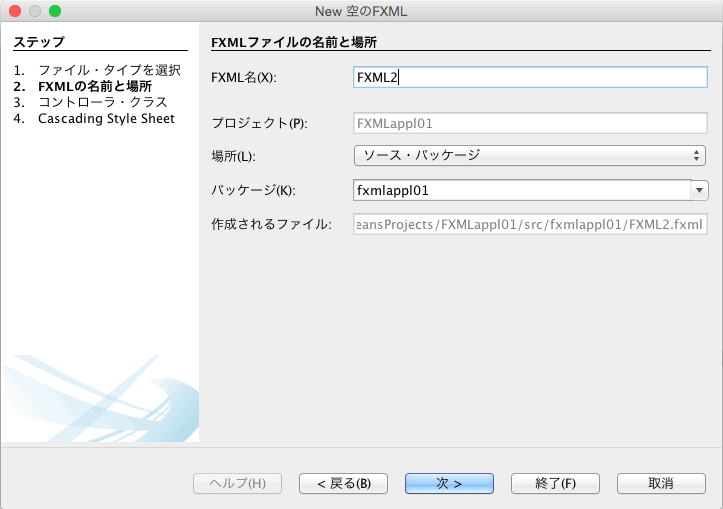
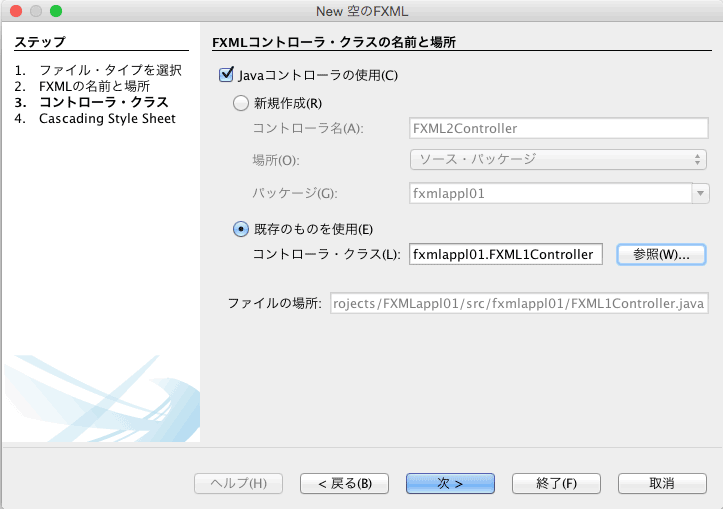
● FXMLsample01.fxml
● FXMLsample01.java
● FXMLappl001.java
● FXMLDocumentController.java
● FXMLDocument.fxml
● FXChart01.java
● FXChart02.java
● FXChart03.java
● FXChart04.java
● FXimage01.java
● FXimage02.java
読み込む画像:Earth.jpg
● AnimSample01.java
● FX3Dsample04.java
貼り付ける画像:physical-free-world-map-b1.jpg
● DateTest01.java
● DateTest02.java
● DateTest06.java
● DateTest07.java
● FXsample05.java
● LmbdSample01.java
● SoundTest01.java
● SoundTest02.java
● SoundTest03.java
サウンドサンプル:music001.wav(サイズに注意!:17MB)
(提供元:フリーBGM素材 『霞む道を』 試聴ページ フリーBGM DOVA-SYNDROME)
● GUIdesign01のプロジェクト
● FXsample04.java
—– 目次 —————————————————–
1 はじめに
2 GUI構築の基本
2.1 Applicationクラス
2.2 StageクラスとSceneクラス
2.3 ウィンドウサイズの変更を禁止する設定
2.4 GUIの可視属性の設定
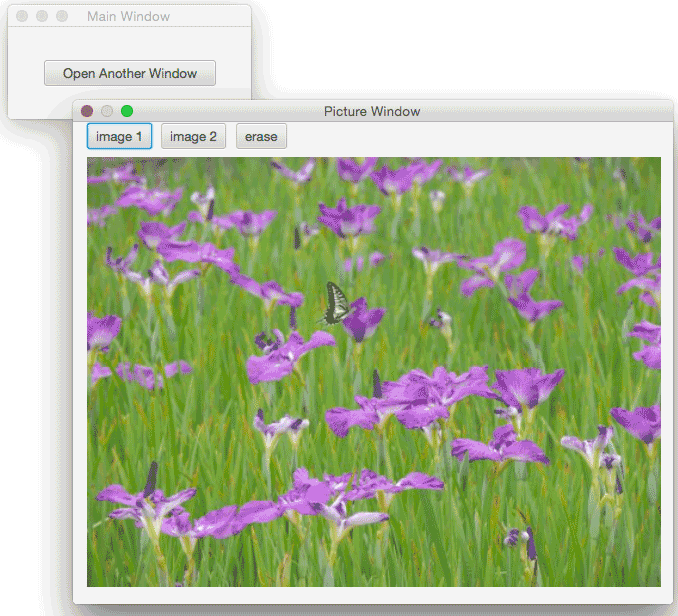
2.5 複数のウィンドウを生成する方法
2.6 アプリケーションの終了に関する処理
2.6.1 アプリケーション終了時に呼び出されるメソッド
3 三次元グラフィックス
3.1 基礎事項
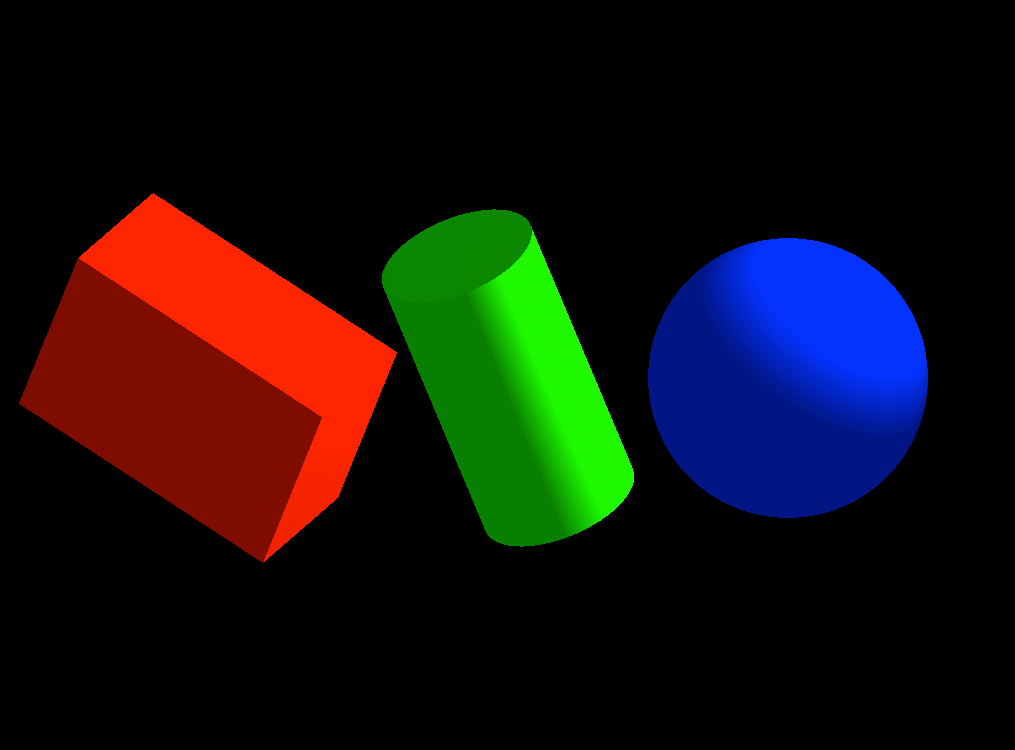
3.2 直方体,円柱,球
3.2.1 シーングラフの準備
3.2.2 Colorクラスによる色の指定
3.2.3 基本的な三次元オブジェクトの扱い
3.2.4 平行移動,回転,拡縮
3.2.5 光源
3.2.6 直投影型カメラ
3.2.7 透視投影型カメラ
3.3 メッシュ・グラフィックス
3.3.1 メッシュへのテクスチャの貼付け
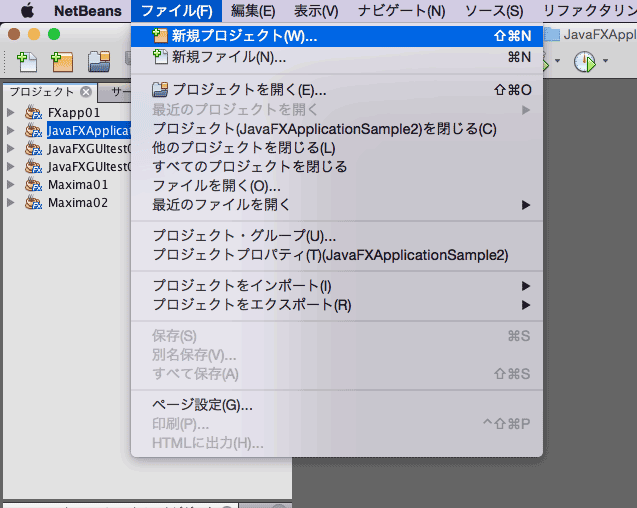
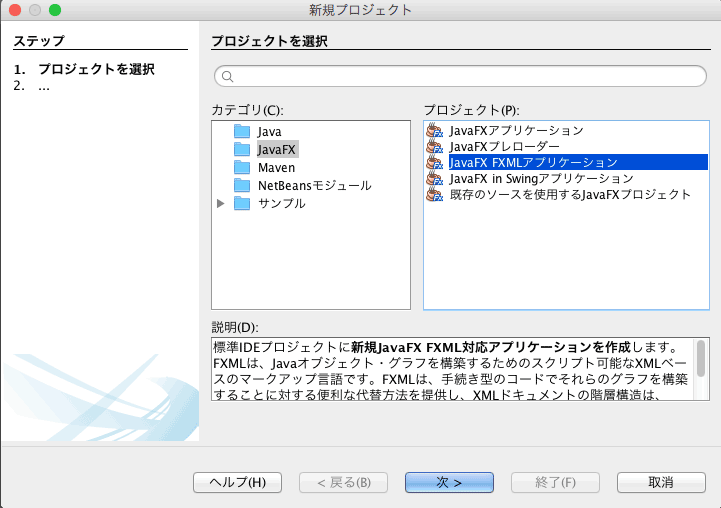
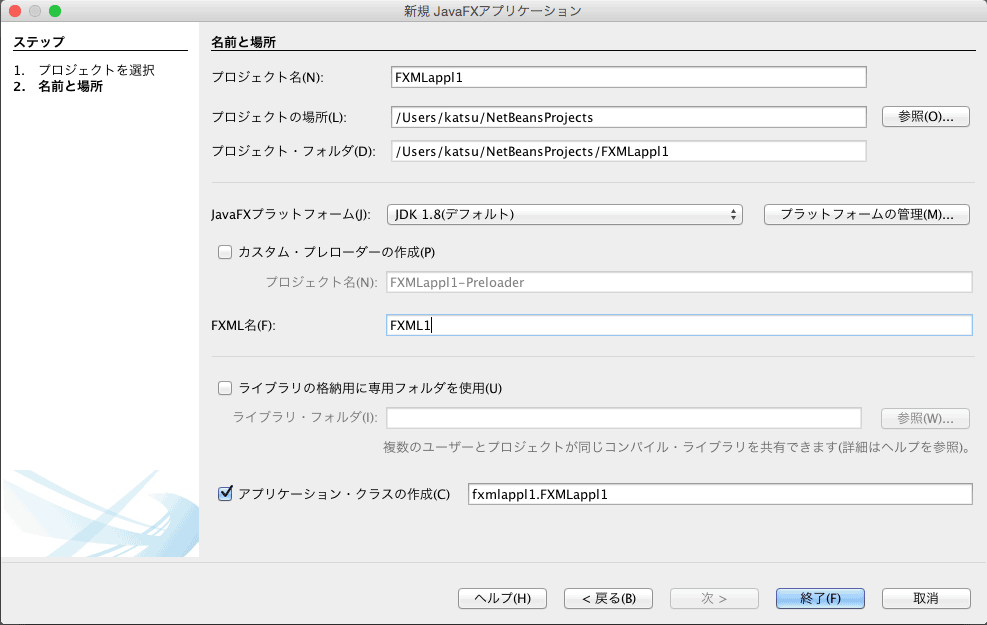
4 FXMLを利用したGUI構築
4.1 サンプルプログラム
4.2 NetBeans IDEの利用
4.2.1 生成された雛形を利用したアプリケーション開発
4.2.2 単独で動作するアプリケーションの生成について
4.3 Java FX Scene Builder
4.3.1 インスペクタ
4.3.2 イベントハンドラとの関連付け
4.3.3 NetBeans IDEとの連携
5 図形の描画
5.1 Shapeを利用した描画
5.1.1 線の描画: Line / Polyline
5.1.2 線に属性を与えるメソッド
5.1.3 図形描画における「枠」と「塗り」
5.1.4 各種図形の描画: Rectangle / Circle / Ellipse / Arc / Polygon
5.1.5 塗りの属性
5.1.6 文字の描画: Text
5.1.6.1 システムで利用できるフォントを調べる方法
5.1.7 画像の表示: ImageView
5.1.8 Shapeオブジェクトの位置の設定: relocate
5.2 Canvasを利用した描画
5.2.1 GraphicsContext
5.2.2 各種の描画メソッド
5.3 チャートの描画
5.3.1 棒グラフ:BarChart
5.3.2 折れ線グラフ:LineChart
5.3.3 円グラフ:PieChart
5.4 画像データの扱い
5.4.1 画像データの入力: Imageクラス
5.4.2 画素(ピクセル)の操作
5.4.3 画像データの出力
5.4.4 サンプルプログラム
5.4.5 ノードの描画状態のキャプチャ
6 時間によるイベント処理(アニメーション)
6.1 タイミング・イベントについて
6.2 タイムラインとキーフレーム
6.3 サンプルプログラム
7 日付と時刻
7.1 旧来のAPI(Java SE 7)
7.1.1 日付と時刻のためのクラス
7.2 新しいAPI(Java SE 8)
7.2.1 基本的なクラス
7.2.2 日付・時刻に関する基本的な処理
7.2.3 和暦の扱い
8 ラムダ式
8.1 イベントハンドラ登録への応用
8.2 関数型インターフェースでの応用
9 サウンドの再生(Java SE 7)
9.1 基礎事項
9.2 実用的なサウンド再生
10 メディアデータの再生(Java FX 8)
10.1 動画再生に関すること
11 付録
11.1 Java FXで利用できるGUIの部品(代表的なもの)
11.1.1 コンテナ:Containers
11.1.1.1 HBox,VBoxを用いたGUIの配置
11.1.2 コントロール:Controlls
11.1.2.1 項目データを与える方法
11.1.3 値の変化を検知するイベント
11.2 メニューの構築
11.3 ファイル選択ダイアログの実装
11.4 Java FX 8 の重要なクラス
11.5 イベントについて
11.5.1 旧来のGUIで扱うイベント
11.5.2 タッチデバイスで扱うイベント
—————————————————————-
Java FX 8 の入門書
コメントを残す