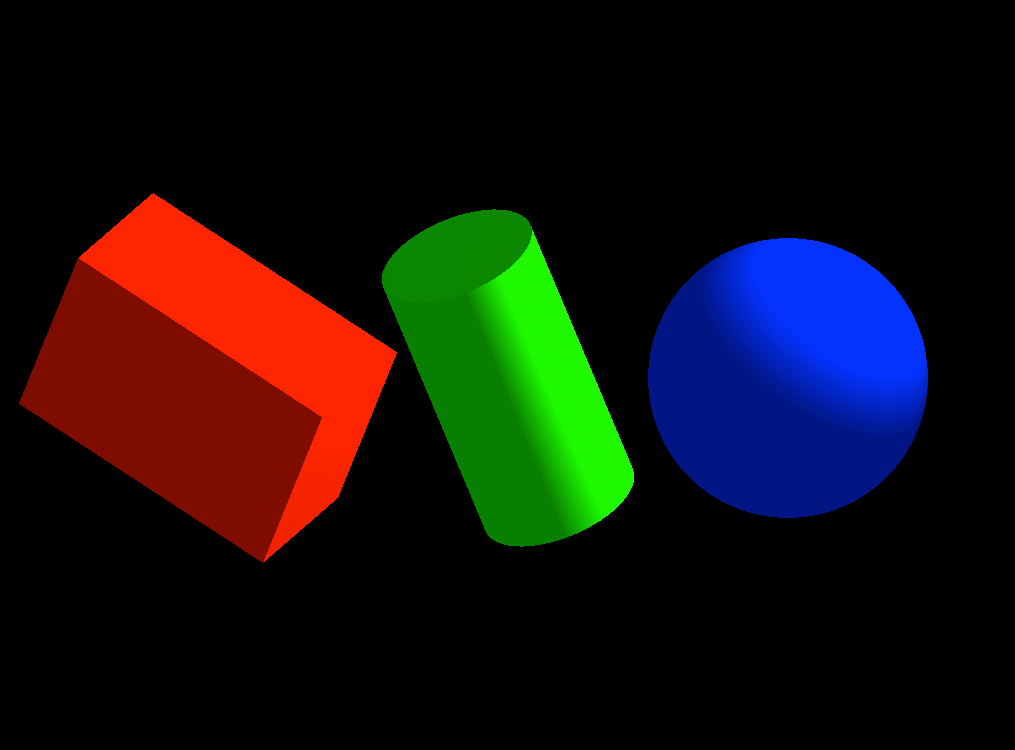
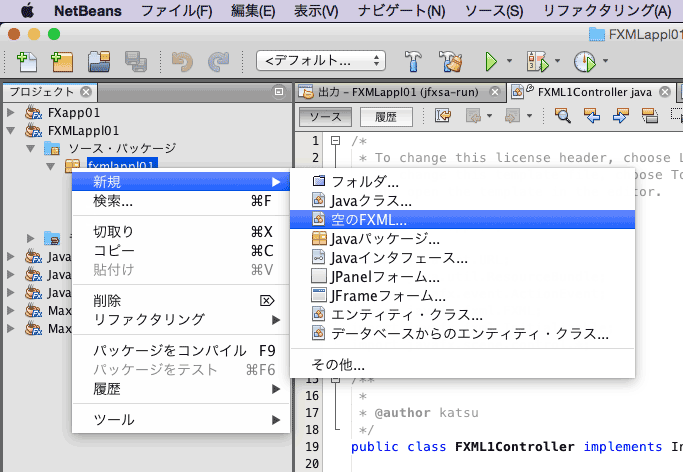
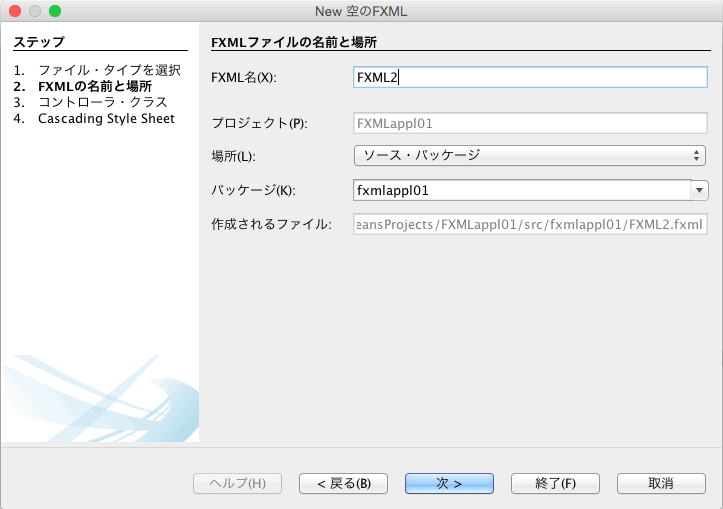
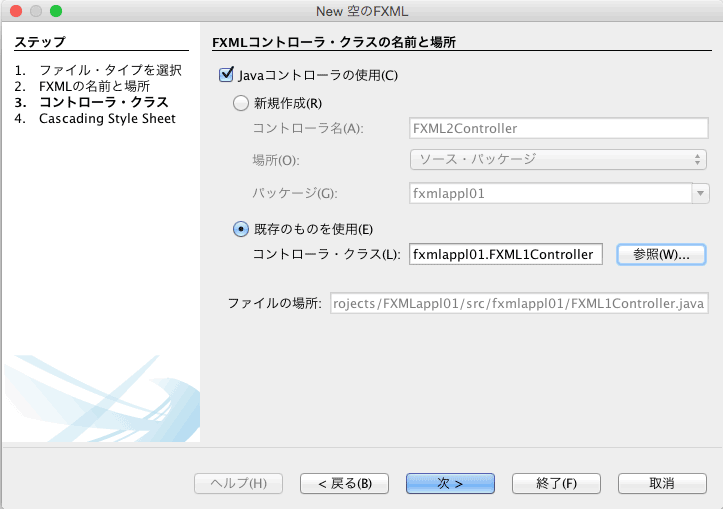
超入門:立体の表示,回転と平行移動,カメラ,光源の基本
import javafx.application.Application;
import javafx.scene.*;
import javafx.scene.layout.*;
import javafx.scene.paint.*;
import javafx.stage.Stage;
import javafx.scene.shape.*;
import javafx.scene.transform.*;
import javafx.geometry.Point3D;

public class FX3Dsample01 extends Application {

	@Override
	public void start(Stage Stage) {
		//--- Top Node and Scene ---
		Group root = new Group();
		Scene scene = new Scene(root, 1024, 768, Color.rgb(0,0,0));

		// Axis for Rotation
		Point3D aX = new Point3D(100,0,0);
		Point3D aY = new Point3D(0,100,0);
		Point3D aZ = new Point3D(0,0,100);

		//--- Solid Model Generation ---
		// (Box)
		Box bx1 = new Box(300d,200d,150d);
		root.getChildren().add(bx1);
		PhongMaterial mt1 = new PhongMaterial(); // 別々に作る!
		mt1.setDiffuseColor(Color.rgb(255,0,0));
		bx1.setMaterial(mt1);
		bx1.getTransforms().addAll(
			new Translate(-300d,0d,0d), // 先に平行移動
			new Rotate(30,aX),
			new Rotate(30,aY),
			new Rotate(20,aZ)
		);
		// (Cylinder)
		Cylinder cl1 = new Cylinder(80d,300d);
		root.getChildren().add(cl1);
		PhongMaterial mt2 = new PhongMaterial(); // 別々に作る!
		mt2.setDiffuseColor(Color.rgb(0,255,0));
		cl1.setMaterial(mt2);
		cl1.getTransforms().addAll(
			new Rotate(30,aX),
			new Rotate(0,aY),
			new Rotate(-20,aZ)
		);
		// (Sphere)
		Sphere sp1 = new Sphere(140d);
		root.getChildren().add(sp1);
		PhongMaterial mt3 = new PhongMaterial(); // 別々に作る!
		mt3.setDiffuseColor(Color.rgb(0,0,255));
		sp1.setMaterial(mt3);
		sp1.getTransforms().addAll(
			new Translate(280d,0d,0d)
		);

		//--- Light Setting ---
		AmbientLight aLight = new AmbientLight(Color.rgb(127, 127, 127));
		root.getChildren().add(aLight);

		PointLight pLight = new PointLight(Color.rgb(255,255,255));
		pLight.setTranslateX(500d);
		pLight.setTranslateY(-300d);
		pLight.setTranslateZ(-200d);
		root.getChildren().add(pLight);

		//--- Camera Setting ---
		ParallelCamera cmr = new ParallelCamera();
		cmr.getTransforms().addAll(
			new Translate(-512d,-384d,0d)
		);
		scene.setCamera(cmr);

		//--- Window Activation ---
		Stage.setTitle("FX3Dsample01");
		Stage.setScene(scene);
		Stage.show();
	}

	public static void main(String[] args) {
		launch(args);
	}
}